Space Pipes!
So recently the amazing community run by Christian Henson called Pianobook hosted a contest to produce an instrument based on an audio sample of 29 bagpipes warming up in a school yard. The sound is exactly what you would imagine – a blaring drone of discordant harmonies fading in and out of each other. Have a listen! It’s a a very interesting and textured sound but definitely a tricky sample to build an instrument out of. This is because…
Q. What’s the definition of a minor second?
A. Two bagpipes playing in unison. 😂
This post is to share how I created my Kontakt instrument “Space Pipes” from this awful cacophony. This is my first effort at producing a Kontakt instrument and I’m quite pleased with the results. To me it sounds like a celestial space organ but it has another mode that produces a real horrid bagpipe granular texture layer. I haven’t had time to make a demo track so if you’d like to hear it in action you can download the Kontakt patch here: Download the instrument!
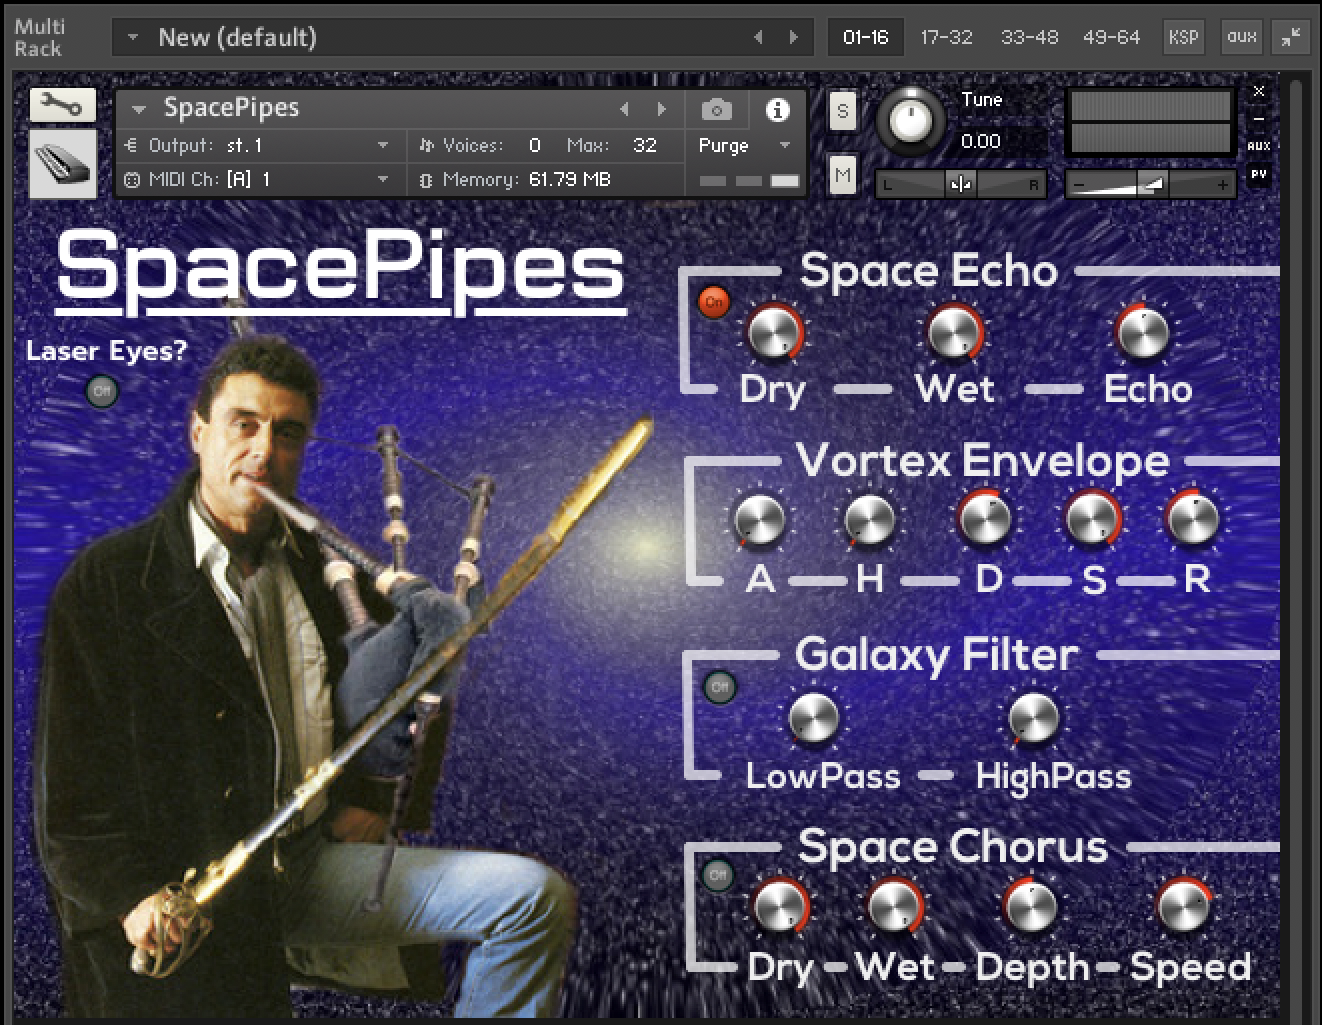
Introducing SpacePipes!
1. Islands and Penguins
Typically for these Pianobook contests you would produce a video to share how the instrument was produced. Unfortunately/fortunately this is not possible for me as in my day job I work as a marine ecologist. Right now I’m working on an island in southern NSW, Australia GPS tagging penguins. As a consequence we don’t have access to reliable or good internet to upload a large video file.
I still want to be able to share what I’ve done with Pianobook however so I thought instead I’d just write a quick markdown document giving an overview of my process. For those that are more interested in penguins than my odd little Kontakt instrument (I imagine that’s probably everyone) feel free to message me and I’ll give a brief description of my research and what I’m doing out here.

The Remote and beautiful island I’m currently working from.
2. Tuning the Bagpipes
First things first. In order to make a musical instrument out of this sound it would help us if the sound itself tuned to a typical musical pitch. As it turns out the tuning of bagpipes is not actually that straight forward a task! Well a quick google reveals that bagpipes typically tune to Bb which has the frequency 466.16 Hz. So first thing I did is play a Bb sine wave over the top of the sample to see if that’s indeed what they were playing… However in true bagpipe fashion, this sounded garbage! Have a listen!

These sounds clashed horribly!
Well obviously, the bagpipes are a little more complex than I thought so a little more research was required to work out what was going on here. Well as it turns out, for a slew of historical reasons to do with how the writing of music has evolved over the years, it turns out that the Bb modern bagpipes tune to is actually between 476 to 480 Hz! This is roughly halfway between Bb and B. So in order to have a well functioning instrument, we will need to do some slight pitch shifting to the instrument.
Well there are two ways we can work out how much we need to shift our note. (1) We can just tune to our reference Bb until it sounds about right to us or (2) we can do a little bit of mathematics to work out exactly how many cents we need to pitch shift the sample to do the impossible and get a perfectly in tune bagpipe! Obviously I’m going to take the second approach because I love making things needlessly difficult.
Basically what we want to do is calculate how many cents we need to retune our sample from ~ 478 Hz to 466.16 Hz (Bb). It actually isn’t that difficult to do this. Musical notes and their respective frequencies follow something called a binary logarithmic scale. This basically means, each octave is double the frequency of the previous octave. Here’s a nice visual representation of this.
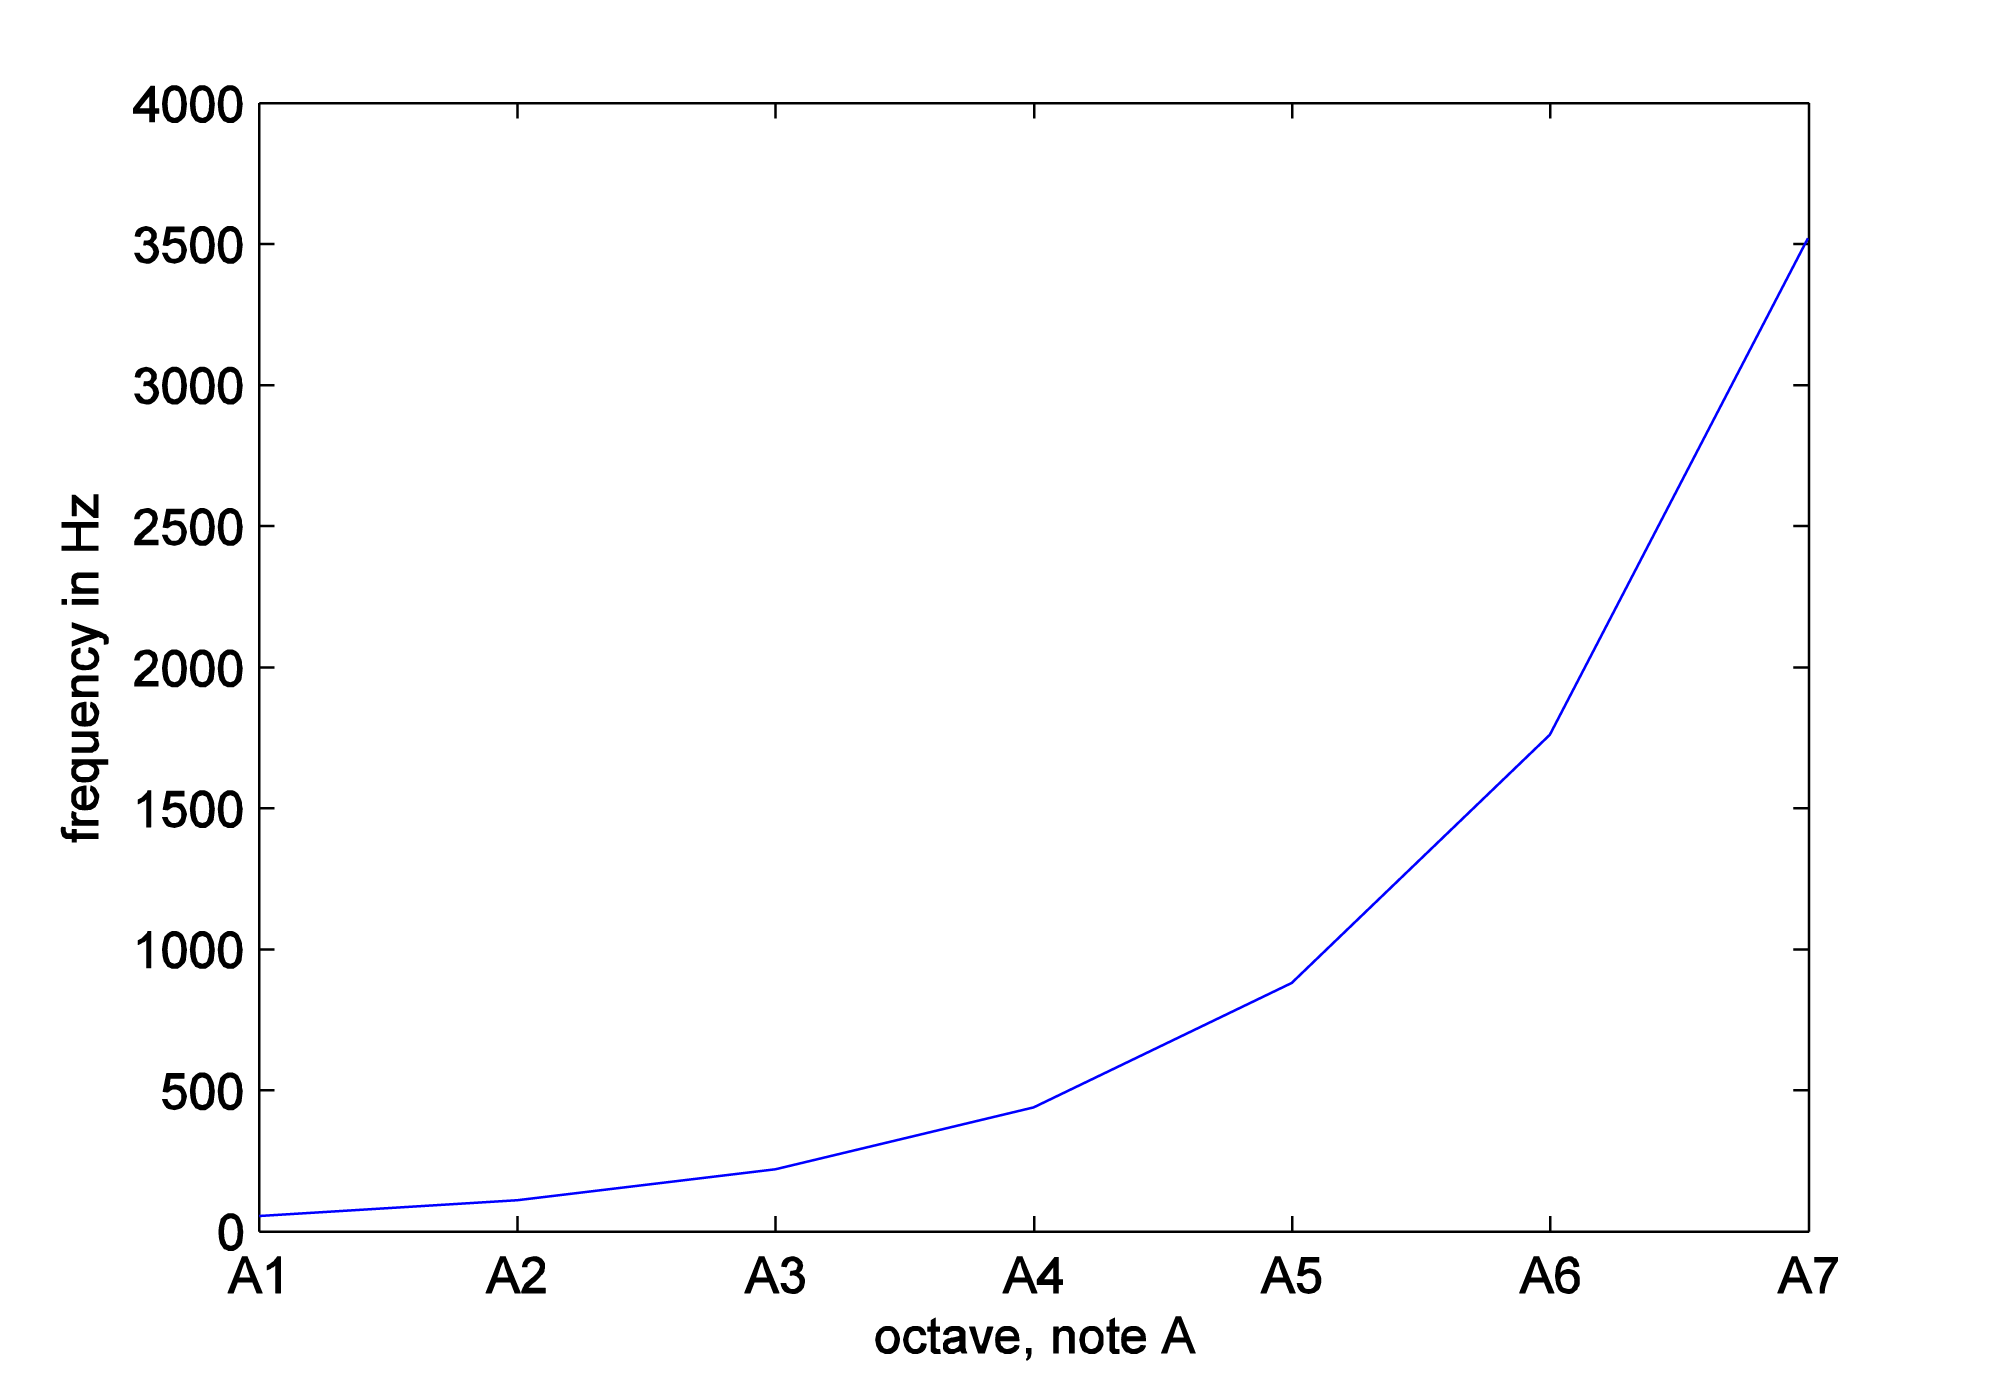
Music Octaves - each octave is double the frequency of the previous and thus follows a binary logarithmic scale.
A cent is one 100th of a note. Consequently in order to calculate how many cents we need to shift our sample, we can use the binary logarithm applied to the ratio between our two desired frequencies. To get the cents we just times this by 1200 because there are 12 notes in an octave and each has 100 cents (12x100 = 1200). So here’s our formula:
And when we put in our values we get this…
Which equals just under 43 cents. So I shifted down the sample by 43 cents and then once again tried playing it alongside the Bb sine wave. The result was much more pleasing to the ear!
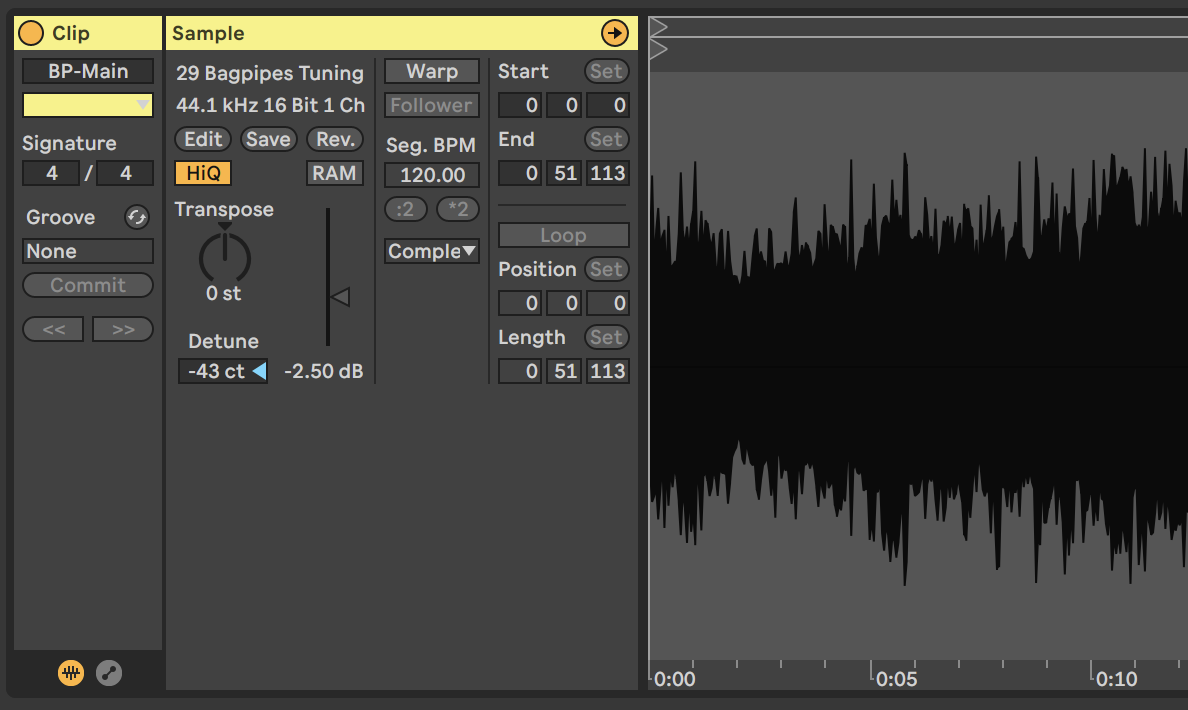
Shifting the sample down 43 cents.
3. Making it Musical
Now that we have achieved the remarkable feat of tuning a bagpipe we can proceed with impossible task of turning this awful cacophony into something somewhat musical. This is a pretty difficult task because if you listen to the sample you will hear that other than the main drone in Bb there are all sorts of overtones and runs being played, all of them fading in and out of each other. This makes it very difficult to make a sample based instrument that can play chords and multiple notes as these overtones will clash with each other. I experimented for hours with a whole range of different processing methods to turn these into simplified drones and sounds with a bit of success but I would always have this same problem when it came to playing chords or anything other than 5ths on the keyboard.
Fortunately for me I recently watched a video by a very talented Pianobook community member named David Hilowitz. In this video David demonstrates how he extracted music elements from the rusty gate sample (for another Pianobook contest) using a software by Izotope called RX Elements. After seeing the utility of this software I had to have it, and luckily for me it was on special for $29.
So now I could go feed in my newly tuned bagpipe sample and go through and extract a bunch of isolated musical notes from the instruments and ignore all of those difficult to work with overtones and runs going on in the sample.
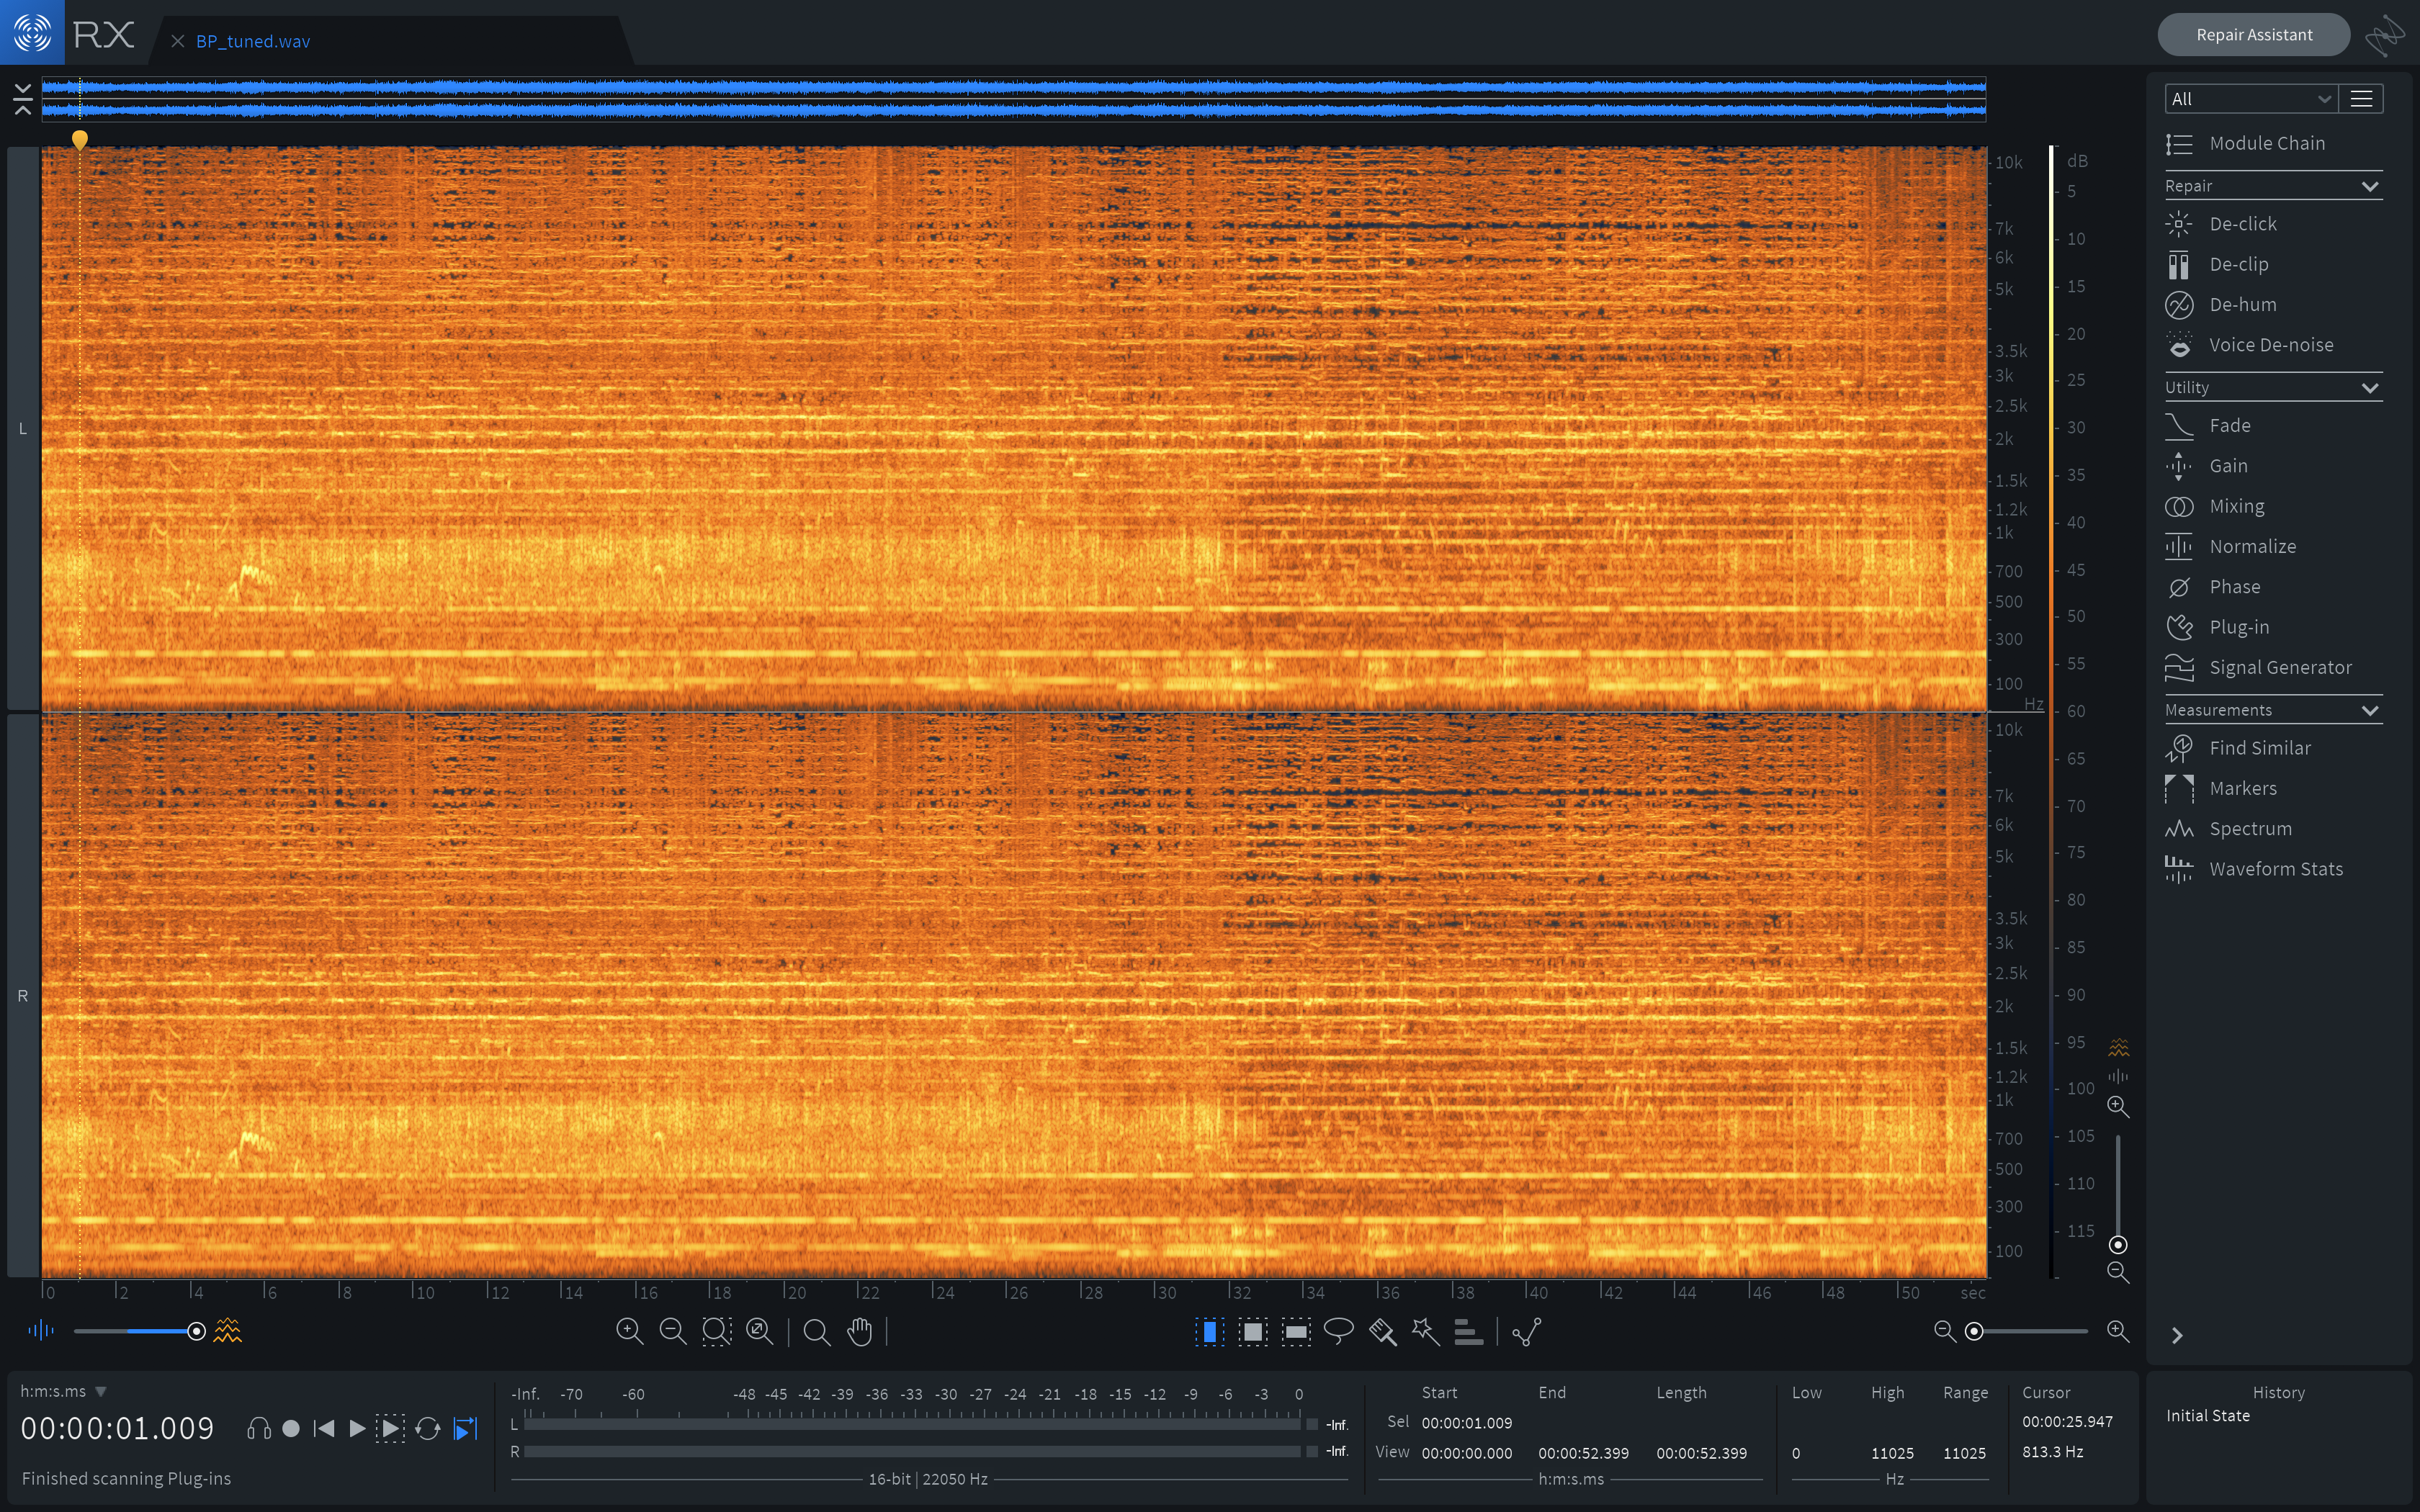
RX Elements allows you to explore your audio files as a frequency “heatmap” where your x-axis is time, y-axis is the frequency and the colour (heat) indicates a frequency’s volume in decibels.
I was really impressed with this software. Here’s a quick screen shot where I isolated the vocal call of someone in the sample (it appears at 5 seconds). I didn’t end up using this particular extraction for Space Pipes (I wanted this to be bagpipe focused) but I made another “whistle” instrument out of it that sounds pretty cool that maybe I’ll share a bit later. Here’s the sound that I isolated in the below image.
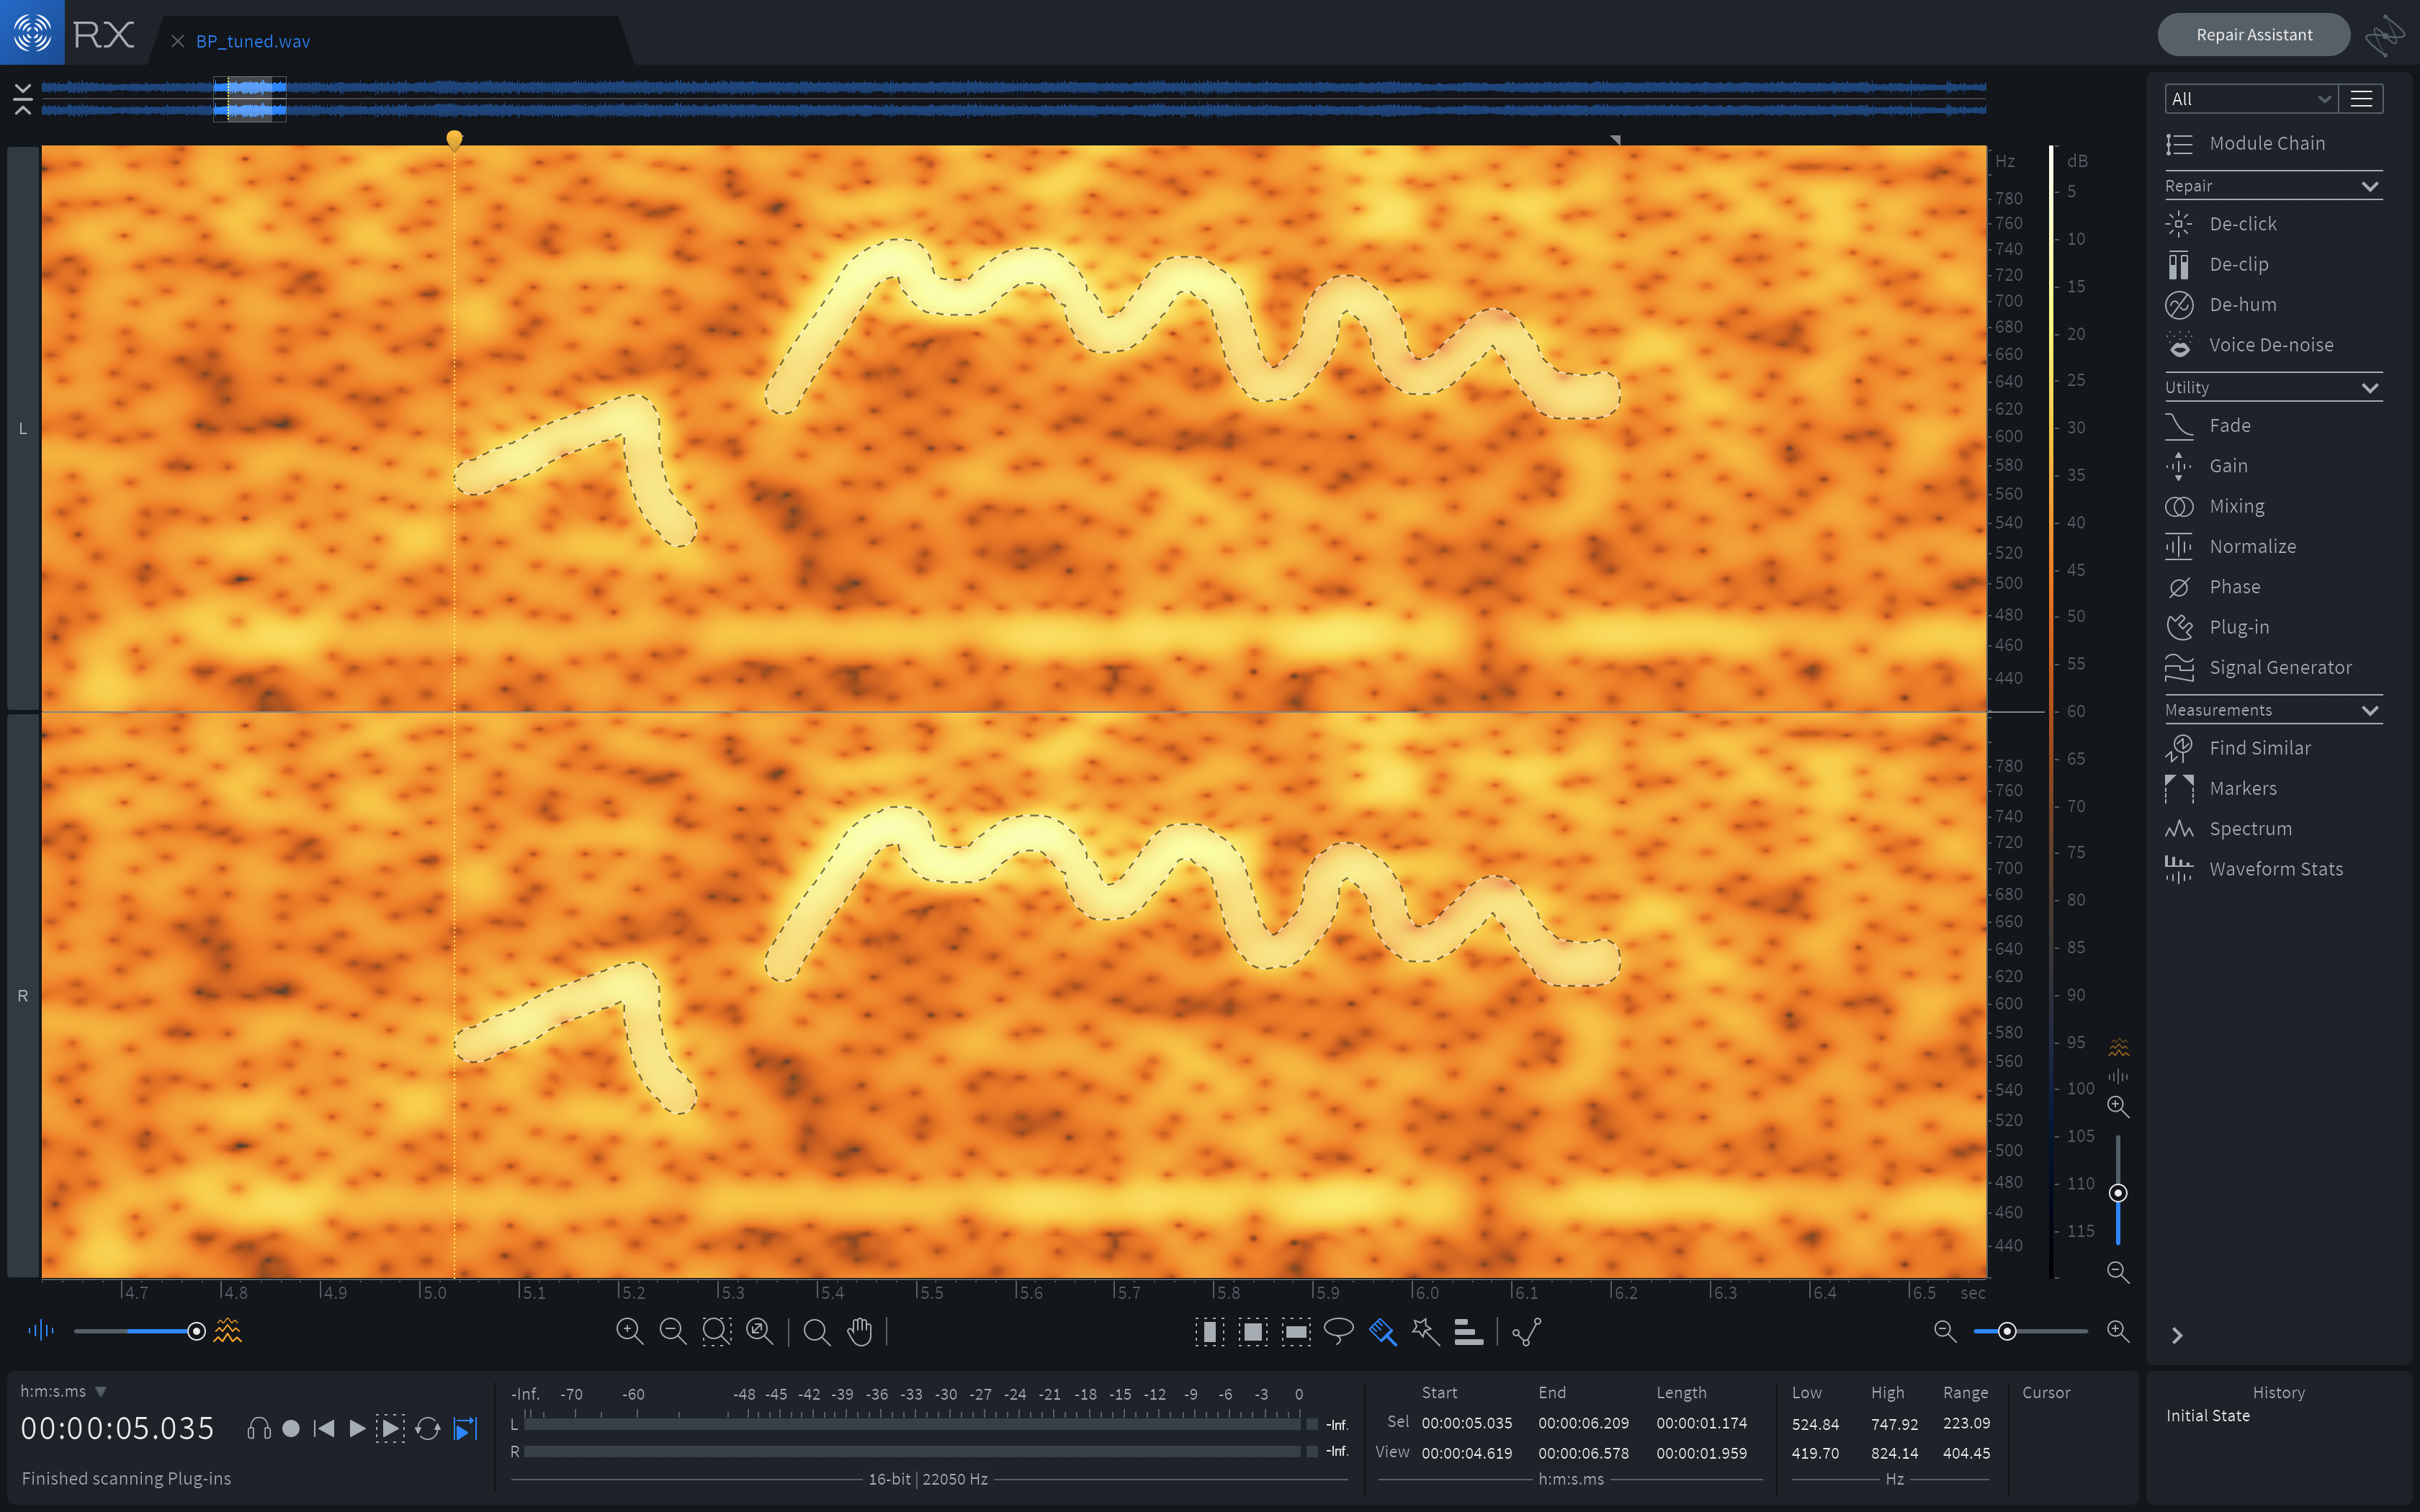
Isolating a vocal snippet from the bagpipes sample
Once I had a few isolated notes I choose my favourite and did a bit of cleaning and fed this into the Kontakt. Then I added a few effects and EQ and and scripted up a beautiful looking interface. I have to say I’m pretty pleased with the results. If you haven’t already download the instrument! and have a play yourself!
4. Laser Eyes and Granular Synthesis?
So after all this work I had a pretty freaking awesome space organ instrument that I believe rivals that of Spitfire’s Symphonic Organ 😉! It sounds very clean and we’ve dealt with all those difficult overtones and textures that make the instrument difficult to play. But you know what! I kinda miss all that rubbish as that really is what makes bagpipes sound like bagpipes right?
So I decided it would be really neat to have a secondary mode within the instrument that really focuses in on those sounds and textures you hear within the original sample. To do this I decided I would resample the original sample using some granular synthesis techniques. This is because I really love having elements of chaos and randomness in my soundscapes and I think this particular sample is perfect for this due to all the little amazing textures throughout it (all the random drum hits and people hollering etc.). Also why not have this mode controlled by the “laser eyes” of a space pipe wielding astro explorer? I know right, such an obvious idea.
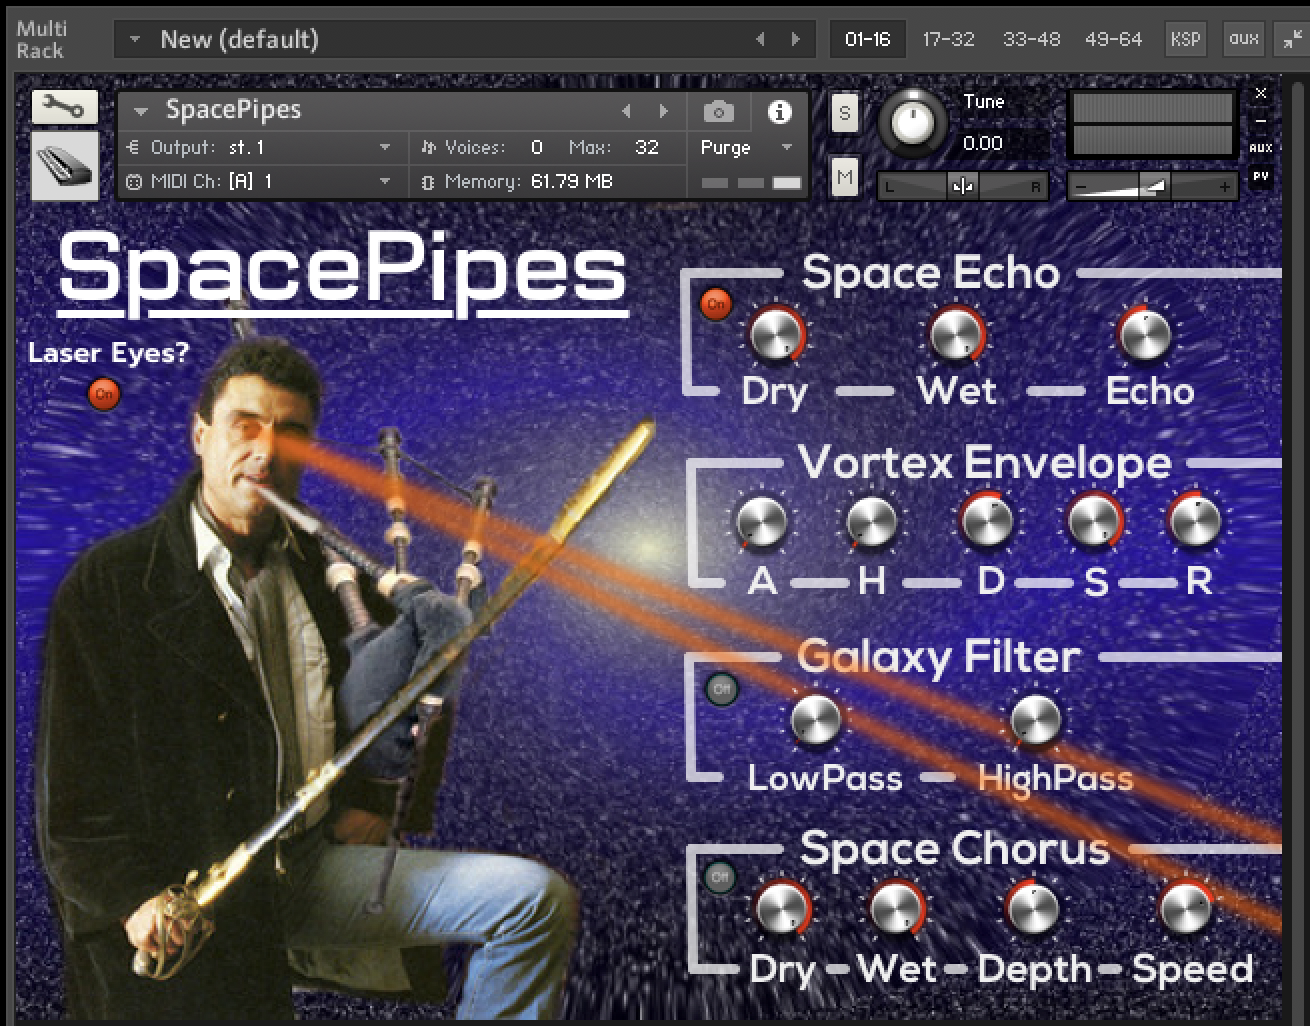
Using laser eyes to control the amount of crazy granular bagpipe texture!
I decided to use a max4live granulator built by Robert Henke (aka Monolake) to build the textures for this part of the instrument because it’s a really awesome granulator that has a really creative randomisation engine with lots of fine scale control. It’s really impressive work.
The awesome granulator by Monolake!
Another reason for using this granulator is that these projects are effectively open source so you can get in and fiddle with the source code or learn from it anyway you want. Definitely a good thing to support for an open community like Pianobook.
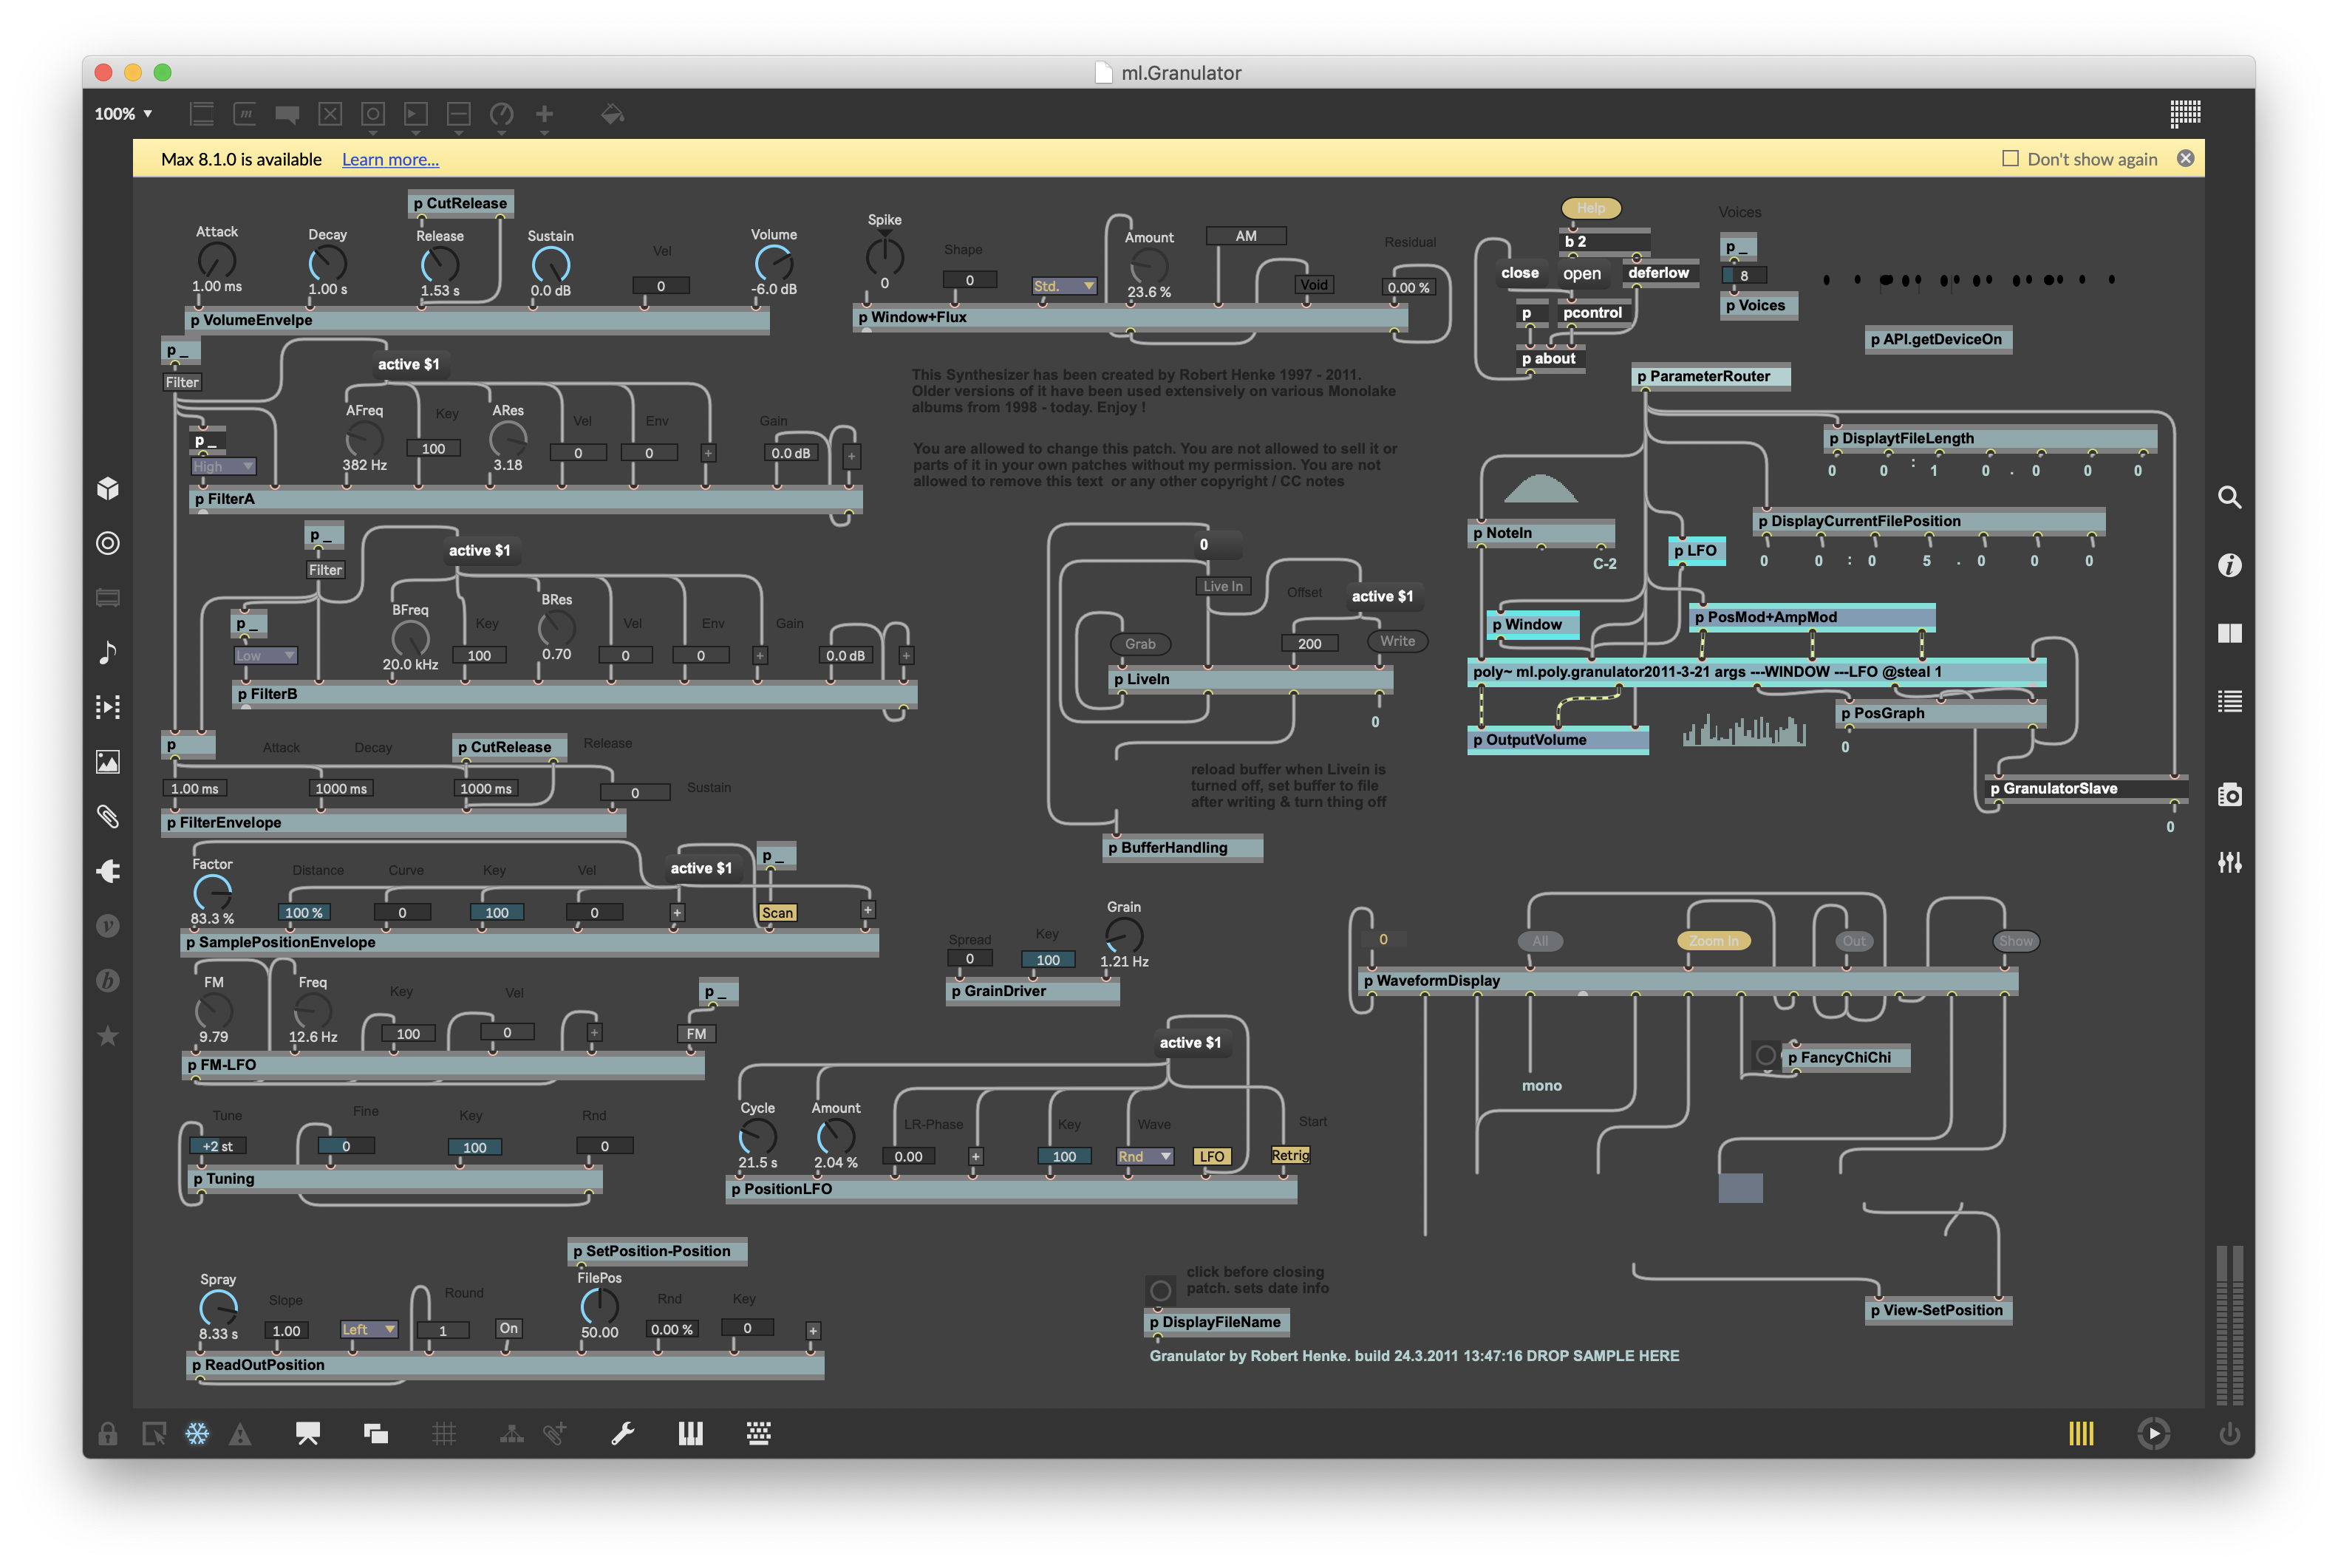
Under the hood of the granulator max4live instrument.
Once I had all the settings set up how I wanted, I loaded in the bagpipes and fed it through a few reverb and delay chains to smooth out the stutters and add even more texture to the sound. Then I set up a midi track to play through 5 octaves sampling at minor third intervals (3 half steps). I use minor thirds for sampling as I think this is a great trade off between effort and sample range. You only need to sample 4 notes per octave (in this case A, C, D# and F#) but when you map the notes, each sample will only need to be pitch shifted 1 semitone in any direction to cover the whole piano! This is great as it means my delay effects and other elements won’t get time warped by pitch shifting the samples. Here’s the result of this processing. Have a listen to A1!
Now I layered this sound over the space organ sound and added in the laser eye controls. This bit was really fun. I won’t go into the Kontakt scripting for this but my script in the Kontakt instrument patch is all open so feel free to dissect it. Also feel free to get in contact if you have any questions about any of this.
I was pretty pleased with the final result. I now have a pretty cool space organ that can be layered with some really interesting granular textures that can make for some really cool drones! Once again if you haven’t already download the instrument! and have a play with it yourself!
Thanks for reading! Feel free to drop me a line at dewitt.musicstudios@gmail.com! Cheers!
5. Bonus - Generating the Laser Eye Controller UI
I had a few questions about how I made the laser eye “knob” controller. I thought I’d add a little bit on to the end of this post to explain how it was done. Basically knob files in Kontakt are just a vertically stacked PNG image with every frame (i.e. every state of the knob) stacked vertically on top of each other. Here’s an example.
So in order to make my “laser eye” knob controller I basically just drew the image of lasers as a PNG and had 101 frames each with a different level of “opacity” (i.e. how transparent an image is). Now you can do this in 2 ways, you could (1) make your image and edit it 101 times and save a whole bunch of versions with different opacity and then stack them all vertically on top of each other (do not do this! Too much work!) or, (2) we can do a bit of simple shell scripting to do all of this automatically.
Obviously we’re going to do the latter because we want to avoid hard work at all cost! The first step is to take our amazing image of laser eyes.

A truly amazing piece of art!
Now we want to create a bunch of copies of this image with different levels of transparency. We can do this using a command line tool called ImageMagick. We’re going to automate this process using a simple shell script like so.
#!/bin/bash
for i in {1..101}
do
   idx=$(expr 101 - $i)
   n=$(printf %03d $idx)
   convert LaserEyes_orig.png -matte -channel A +level 0,$idx% +channel laser$n.png
done
So what this does is loop 101 times and on each loop produces and PNG with a slightly different alpha channel (i.e. different opacity). Save this script as alpha_dup.sh and then we can run it from our terminal using bash alpha_dup.sh. This should produce a directory with all our laser eye PNG frames.
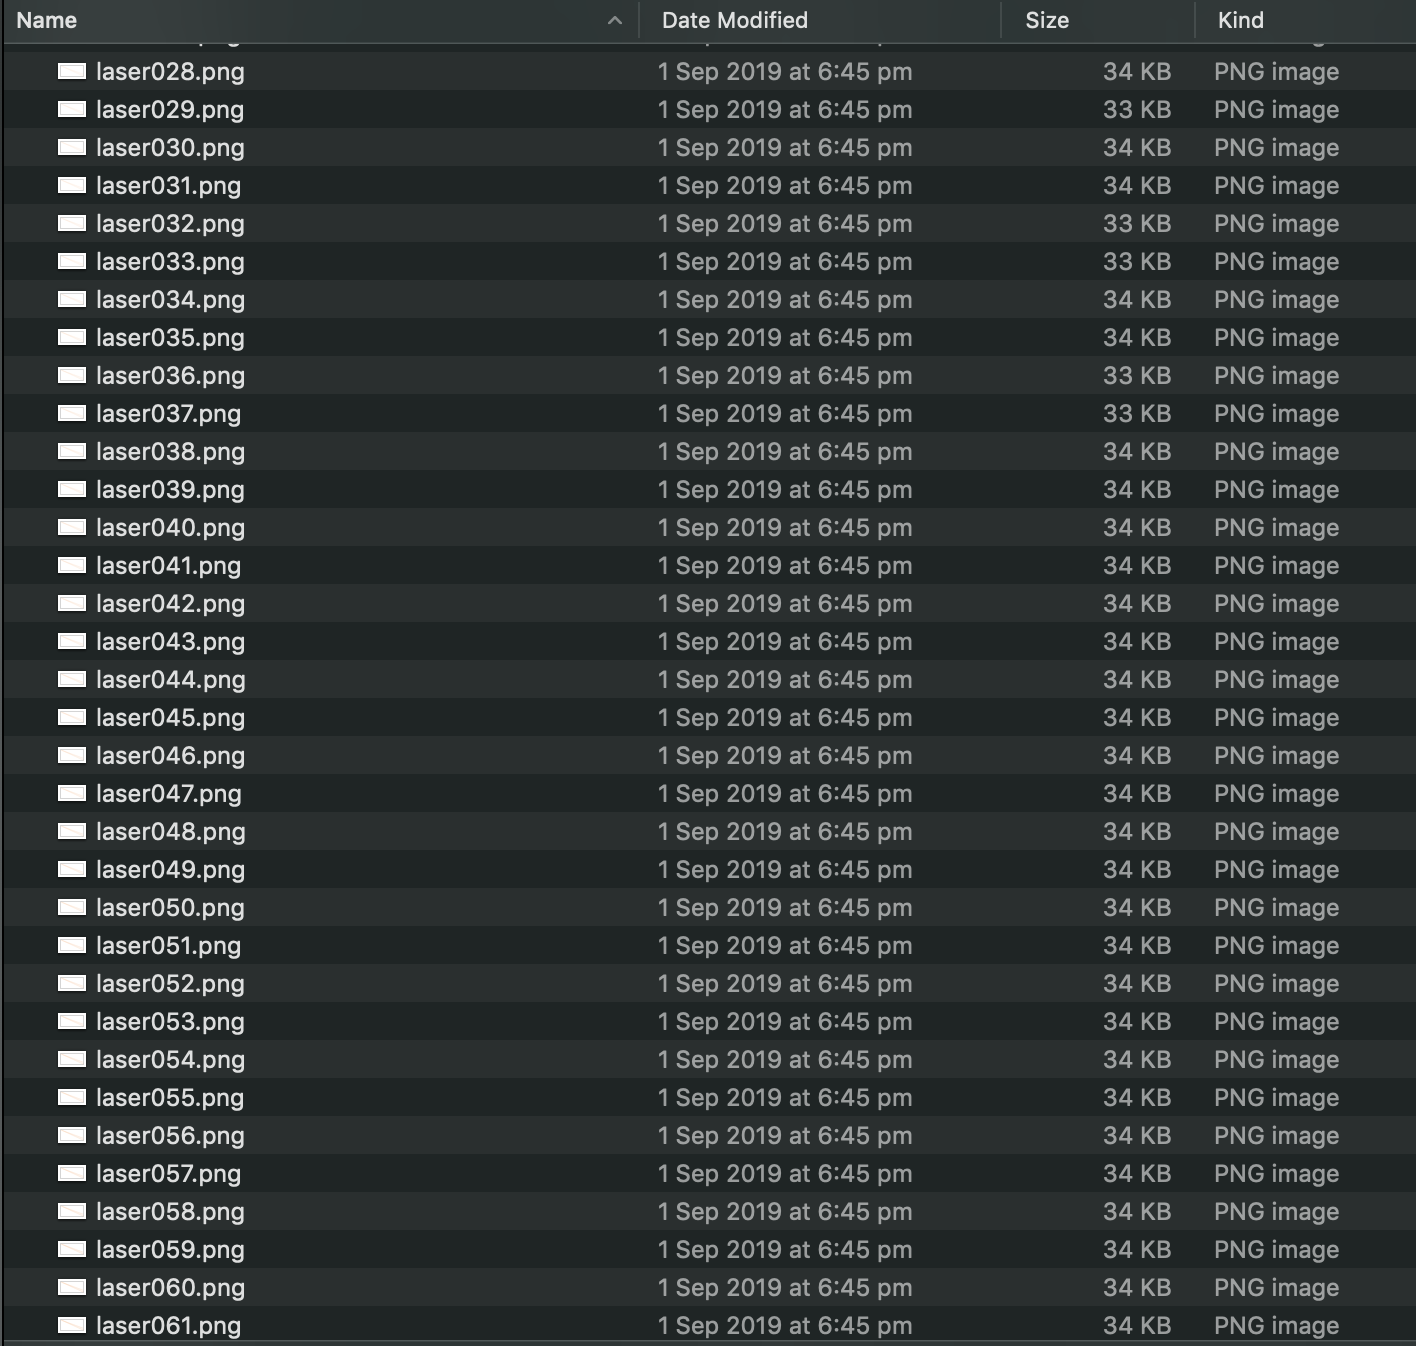
All the files that were generated
Now that we have all out files we can join all of these vertically using another simple ImageMagick command called -append to join all our images together vertically (ordered by the filenames). The * is just a wildcard that means all files ending with .png.
convert -append *.png LaserEyes_render.png
And hey presto we have a joined png file ready to be used as a knob inside Kontakt! Here’s an example of the final product. You’ll probably have to zoom in to see the frames properly. Now we just load it into our Kontakt script as normal…
{##### Laser Eyes - Pipes #####}
{ Control Bagpipe Drone Volume and cool effect}
{ create the control - must be a slider }
declare ui_slider $laser_eyes(0, 870000)
{ hide the slider parts }
hide_part($laser_eyes,  $HIDE_PART_BG .or. $HIDE_PART_MOD_LIGHT .or. $HIDE_PART_TITLE .or. $HIDE_PART_VALUE)
{ assign the image file }
set_control_par_str(get_ui_id($laser_eyes),  $CONTROL_PAR_PICTURE, "LaserEyes")
{ place it on the performance view }
move_control_px($laser_eyes, 102, 96)
{ control how mouse movements should affect the control }
set_control_par(get_ui_id($laser_eyes), $CONTROL_PAR_MOUSE_BEHAVIOUR, 5000)
{ Make default value }
set_knob_defval($laser_eyes, 0)
make_persistent($laser_eyes)
{make extra atttacke variable - to set minimum}
declare $laser_attack_min
$laser_attack_min := 650000
declare $laser_attack
$laser_attack := $laser_attack_min
So there ya have it! Good luck out there!